Deploying a WebAssembly Runtime Environment and UDP Blinking Light Example on Milk-V Duo
1. Introduction
WebAssembly, also known as wasm, is a technology that emerged in 2015, created by web frontend developers. In the world of the web, HTML and JavaScript were originally the dominant interpreted languages, making it easy to create interactive web applications with just a few lines of code. However, some web frontend developers insisted on complicating things by introducing extensive toolkits that required downloading gigabytes of data. As web applications grew larger, performance became a concern. The solution? Keep pushing forward and, after compiling, run in a web environment. This led to the creation of WebAssembly. Not content with just compiling JavaScript, developers continued to push the envelope by compiling code from languages like C, C++, Python, Rust, and even running them in web environments, including bringing OpenCV into the mix with OpenCV.js.
Just as running JavaScript in the frontend wasn’t enough, a separate environment for server-side execution, Node.js, was introduced to cover both ends of the spectrum.
Similarly, WebAssembly continued to evolve and eventually found its way into the realm of embedded systems. Surprisingly, it brought several advantages with it:
- Because it’s compiled, WebAssembly offers excellent runtime performance compared to interpreted languages.
- It allows for one-time compilation and deployment to multiple platforms with minimal runtime overhead.
- WebAssembly runs in a sandboxed environment, making it well-suited for security-sensitive applications.
Java can achieve cross-platform compatibility through compilation, but while Java is like an aircraft carrier, WebAssembly is more like a canoe.
Without further ado, let’s proceed to the practical aspects, starting with the foundational environment and running a UDP blinking light example on the Milk-V Duo.
2. Development and Runtime Environment
To run WebAssembly on the Milk-V Duo, you’ll need the following development and runtime environments:
- Basic Compilation Environment: Host tools, the Milk-V Duo’s own compilation toolchain, essential for Milk-V Duo development.
- WebAssembly Compilation Environment: Wasi-sdk, a toolchain based on Clang & LLVM for compiling C/C++ to WebAssembly.
- WebAssembly Runtime Environment: WAMR (WebAssembly Micro Runtime), a lightweight, standalone WebAssembly runtime environment with a small footprint, high performance, and extensive configurability. It’s suitable for embedded systems, IoT, edge computing, and trusted execution environments (TEE).
The basic workflow includes:
- Use host tools to compile WAMR, generating the runtime environment on the Milk-V Duo. If you plan to run WAMR on a different hardware environment, you’ll need to compile WAMR for that specific environment.
- Compile C/C++ programs into WebAssembly programs using wasi-sdk and run them on the Milk-V Duo. This is a one-time compilation step that enables you to run the program on various hardware platforms.
You can find download links for each of the toolkits here:
-
host-tools
Once host-tools are downloaded, add their path to the PATH environment variable to ensure that the following command can be executed:riscv64-unknown-linux-musl-gcc --version -
wasi-sdk
Wasi-sdk provides precompiled packages for various environments, making it convenient for development across different platforms.
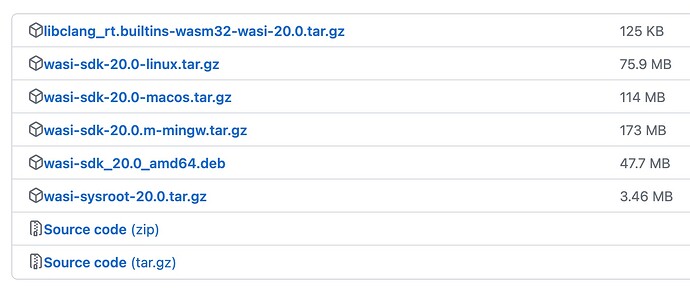
Since I use macOS for my daily development, I downloaded wasi-sdk-20.0-macos.tar.gz. After downloading and extracting it, I created a symbolic link for future use at /opt/wasi-sdk:ln -s /Users/HonestQiao/Project/wasm/wasi-sdk-20.0 /opt/wasi-sdk ls -l /opt/wasi-sdk/bin/With the correct setup, this should display the clang & LLVM toolchain files.
-
WAMR
You can clone the WAMR source code directly using Git:git clone https://github.com/bytecodealliance/wasm-micro-runtime.gitIn the wasm-micro-runtime/product-mini/platforms/linux directory, a minimal WebAssembly environment for running on Linux is provided. You can compile the WAMR runtime environment for a standard Linux environment, but for running it on the Milk-V Duo, you need to make some configurations. After the line
set (WAMR_BUILD_PLATFORM "linux")in wasm-micro-runtime/product-mini/platforms/linux/CMakeLists.txt, add the specific configuration as follows:

set (WAMR_BUILD_PLATFORM "linux")
+SET(CMAKE_C_COMPILER riscv64-unknown-linux-musl-gcc)
+SET(CMAKE_AR riscv64-unknown-linux-musl-ar)
+SET(CMAKE_RANLIB riscv64-unknown-linux-musl-ranlib)
+SET(CMAKE_STRIP riscv64-unknown-linux-musl-strip)
+SET(WAMR_BUILD_TARGET "RISCV64_LP64D")

+SET(CMAKE_C_FLAGS "${CMAKE_C_FLAGS} -D_LARGEFILE_SOURCE -D_LARGEFILE64_SOURCE -D_FILE_OFFSET_BITS=64")
+SET(CMAKE_EXE_LINKER_FLAGS "${CMAKE_EXE_LINKER_FLAGS} -mcpu=c906fdv -march=rv64imafdcv0p7xthead -mcmodel=medany -mabi=lp64d")
In the above configuration, the + sign indicates the added configurations.
After adding the configurations, proceed with the compilation process:
cd wasm-micro-runtime/product-mini/platforms/linux/
cmake .
make

ls -lh iwasm libiwasm.so
The final output will include iwasm, which serves as the entry point for the runtime environment. You can copy it to the Milk-V Duo using scp, place it in /usr/bin/iwasm, and then run the following command:
iwasm --version
If you receive the normal output with the version number, such as iwasm 1.2.3, it indicates a successful deployment of the iwasm runtime environment.
After this, you can proceed to write a “Hello, World!” program for testing.
#include <stdio.h>
#include <stdlib.h>

int main(int argc, char **argv)
{
    printf("Hello world!\n");
    printf("I am wasm!\n");
    return 0;
}
- hello
At this point, for the compilation, you need to use the wasi-sdk, and the specific steps are as follows:
export PATH="/opt/wasi-sdk/bin:$PATH"
clang -O3 -o hello.wasm hello.c
ls -lh *.wasm
After successfully executing these commands, you will see the compilation result as hello.wasm.
If you compiled WAMR for your current computer environment, you can now execute iwasm hello.wasm. Alternatively, you can upload the wasm file to the Milk-V Duo and then run iwasm hello.wasm:
iwasm hello.wasm
Under normal circumstances, the output will be:
Hello world!
I am wasm!
Now, with the development and runtime environment set up, you can continue your journey with WebAssembly.
3. UDP Blinking Light Example
On the development board, there is an LED corresponding to GPIO 440. You can control it by directly manipulating /sys/class/gpio to turn it on and off. There is an example of using shell operations in /mnt/system/blink.sh.
You need to make some adjustments to /mnt/system/blink.sh using the vi editor.
#!/bin/sh

LED_GPIO=/sys/class/gpio/gpio440

if test -d $LED_GPIO; then
    echo "GPIO440 already exported"
else
    echo 440 > /sys/class/gpio/export
fi

echo out > $LED_GPIO/direction

+let count=10
-while true; do
+while [ $count -gt 0 ]; do
    echo 0 > $LED_GPIO/value
    sleep 0.5
    echo 1 > $LED_GPIO/value
    sleep 0.5
+    let count=count-1
done
+
+echo 0 > $LED_GPIO/value
+echo 440 > /sys/class/gpio/unexport
In the script above, the + sign indicates added configurations, and the - sign represents removed configurations.
With these changes, after toggling the LED on and off ten times, the script will automatically exit without affecting other programs that control GPIO 440. After making these modifications, reboot your system to apply them.
In the directory wasm-micro-runtime/samples/socket-api/wasm-src, there are example programs related to sockets. You can refer to udp_server.c to write udp_light.c, a program that can control the LED. Here are the specific contents:
#include "socket_utils.h"

#include <arpa/inet.h>
#include <stdio.h>
#include <stdlib.h>
#include <string.h>
#include <sys/socket.h>
#include <unistd.h>
#ifdef __wasi__
#include <wasi_socket_ext.h>
#endif

#include <fcntl.h> //define O_WRONLY and O_RDONLY

#define MAX_CONNECTIONS_COUNT 10000

// LED 引脚
#define SYSFS_GPIO_EXPORT "/sys/class/gpio/export"
#define SYSFS_GPIO_UNEXPORT "/sys/class/gpio/unexport"
#define SYSFS_GPIO_RST_PIN_VAL "440"
#define SYSFS_GPIO_RST_DIR_TPL "/sys/class/gpio/gpio%s/direction"
#define SYSFS_GPIO_RST_DIR_VAL "OUT"
#define SYSFS_GPIO_RST_VAL_TPL "/sys/class/gpio/gpio%s/value"
#define SYSFS_GPIO_RST_VAL_H "1"
#define SYSFS_GPIO_RST_VAL_L "0"

static void
init_sockaddr_inet(struct sockaddr_in *addr)
{
    /* 0.0.0.0:1234 */
    addr->sin_family = AF_INET;
    addr->sin_port = htons(1234);
    addr->sin_addr.s_addr = htonl(INADDR_ANY);
}

int
main(int argc, char *argv[])
{
    int socket_fd = -1, af, fd;
    socklen_t addrlen = 0;
    struct sockaddr_storage addr = { 0 };
    char reply_message[50] = {0};
    unsigned connections = 0;
    char ip_string[64] = { 0 };
    char buffer[1024] = { 0 };

    // gpio变量
    char str_sysfs_gpio_rst_pin_val[5] = {0};
    char str_sysfs_gpio_rst_dir[64] = {0};
    char str_sysfs_gpio_rst_val[64] = {0};

    // 从命令行获取gpio编号
    if (argc > 1 && strlen(argv[1])<4) {
        snprintf(str_sysfs_gpio_rst_pin_val, 4, "%s", argv[1]);
        printf("[Server] Info: gpio is config:%s\n", str_sysfs_gpio_rst_pin_val);
    } else {
        snprintf(str_sysfs_gpio_rst_pin_val, 4, "%s", SYSFS_GPIO_RST_PIN_VAL);
        printf("[Server] Info: gpio is defalt:%s\n", str_sysfs_gpio_rst_pin_val);
    }

    // 设置gpio对应的direction和value文件
    snprintf(str_sysfs_gpio_rst_dir, 50, SYSFS_GPIO_RST_DIR_TPL, str_sysfs_gpio_rst_pin_val);
    snprintf(str_sysfs_gpio_rst_val, 50, SYSFS_GPIO_RST_VAL_TPL, str_sysfs_gpio_rst_pin_val);

    // 打开端口/sys/class/gpio# echo ??? > export
    fd = open(SYSFS_GPIO_EXPORT, O_WRONLY);
    if (fd == -1)
    {
        perror("export gpio error.\n");
        goto fail;
    } else {
        printf("[Server] OK: export gpio %s success.\n", str_sysfs_gpio_rst_pin_val);
    }
    write(fd, SYSFS_GPIO_RST_PIN_VAL, sizeof(SYSFS_GPIO_RST_PIN_VAL));
    close(fd);

    // 设置端口方向/sys/class/gpio/gpio???# echo out > direction
    fd = open(str_sysfs_gpio_rst_dir, O_WRONLY);
    if (fd == -1)
    {
        perror("direction set error.\n");
        goto fail;
    } else {
        printf("[Server] OK: direction set success.\n");
    }
    write(fd, SYSFS_GPIO_RST_DIR_VAL, sizeof(SYSFS_GPIO_RST_DIR_VAL));
    close(fd);

    // 输出复位信号: 拉高>100ns
    fd = open(str_sysfs_gpio_rst_val, O_RDWR);
    if (fd == -1)
    {
        perror("gpio init error.\n");
        goto fail;
    } else {
        printf("[Server] OK: gpio init success.\n");
    }
    write(fd, SYSFS_GPIO_RST_VAL_L, sizeof(SYSFS_GPIO_RST_VAL_L));

    af = AF_INET;
    addrlen = sizeof(struct sockaddr_in);
    init_sockaddr_inet((struct sockaddr_in *)&addr);

    printf("[Server] Create socket\n");
    socket_fd = socket(af, SOCK_DGRAM, 0);
    if (socket_fd < 0) {
        perror("Create socket failed");
        goto fail;
    }

    printf("[Server] Bind socket\n");
    if (bind(socket_fd, (struct sockaddr *)&addr, addrlen) < 0) {
        perror("Bind failed");
        goto fail;
    }

    printf("[Server] Wait for clients to connect(max is %d) ..\n", MAX_CONNECTIONS_COUNT);
    while (connections < MAX_CONNECTIONS_COUNT) {
        addrlen = sizeof(addr);
        /* make sure there is space for the string terminator */
        int ret = recvfrom(socket_fd, buffer, sizeof(buffer) - 1, 0,
                           (struct sockaddr *)&addr, &addrlen);
        if (ret < 0) {
            perror("Read failed");
            goto fail;
        }
        buffer[ret] = '\0';

        if (sockaddr_to_string((struct sockaddr *)&addr, ip_string,
                               sizeof(ip_string) / sizeof(ip_string[0]))
            != 0) {
            printf("[Server] failed to parse client address\n");
            goto fail;
        }

        printf("[Server] received %d bytes from %s: %s\n", ret, ip_string,
               buffer);


        if(strcmp(buffer, "on")==0 || strcmp(buffer, "ON")==0) {
            snprintf(reply_message, 50, "light on");
            write(fd, SYSFS_GPIO_RST_VAL_H, sizeof(SYSFS_GPIO_RST_VAL_H));
        }
        else if(strcmp(buffer, "off")==0 || strcmp(buffer, "OFF")==0) {
            snprintf(reply_message, 50, "light off");
            write(fd, SYSFS_GPIO_RST_VAL_L, sizeof(SYSFS_GPIO_RST_VAL_L));
        }
        else if(strcmp(buffer, "q")==0 || strcmp(buffer, "quit")==0) {
            snprintf(reply_message, 50, "quit");
            break;
        }
        else {
            snprintf(reply_message, 50, "unknow command");
        }
        printf("[Server] Info: %s\n", reply_message);

        if (sendto(socket_fd, reply_message, strlen(reply_message), 0,
                   (struct sockaddr *)&addr, addrlen)
            < 0) {
            perror("Send failed");
            break;
        }

        connections++;
    }

    if (connections == MAX_CONNECTIONS_COUNT) {
        printf("[Server] Achieve maximum amount of connections\n");
    }

    close(fd);

    // 关闭端口/sys/class/gpio# echo ??? > unexport
    fd = open(SYSFS_GPIO_UNEXPORT, O_WRONLY);
    if (fd == -1)
    {
        perror("unexport gpio error.\n");
        goto fail;
    } else {
        printf("[Server] OK: unexport gpio %s success.\n", str_sysfs_gpio_rst_pin_val);
    }
    write(fd, SYSFS_GPIO_RST_PIN_VAL, sizeof(SYSFS_GPIO_RST_PIN_VAL));
    close(fd);

    printf("[Server] Shuting down ..\n");
    shutdown(socket_fd, SHUT_RDWR);
    close(socket_fd);
    sleep(3);
    printf("[Server] BYE \n");
    return EXIT_SUCCESS;

fail:
    printf("[Server] Shuting down ..\n");
    if (socket_fd >= 0)
        close(socket_fd);
    if (fd >= 0)
        close(fd);
    sleep(3);
    return EXIT_FAILURE;
}
In the code above, by leveraging udp_server.c and controlling GPIO in C, you’ve implemented the functionality to turn the LED on, off, or exit by sending “on,” “off,” or “quit” via UDP to the Milk-V Duo.
Next, add the necessary compilation configurations as follows:
# File: samples/socket-api/CMakeLists.txt
add_executable(udp_server ${CMAKE_CURRENT_SOURCE_DIR}/wasm-src/udp_server.c)
+add_executable(udp_light ${CMAKE_CURRENT_SOURCE_DIR}/wasm-src/udp_light.c)

# File: samples/socket-api/wasm-src/CMakeLists.txt
compile_with_clang(udp_server.c)
+compile_with_clang(udp_light.c)
After making these modifications, proceed with the compilation.
cd wasm-micro-runtime/samples/socket-api
mkdir build
cd build
cmake ..
make

ls -l *.wasm
In a normal execution, the instance will output all the generated wasm programs. Upload the udp_light.wasm from this set to the Milk-V Duo for future use.
Since udp_light in this case uses network functionality, and the minimal environment provided by wasm-micro-runtime/product-mini/platforms/linux doesn’t include networking, you need to add the following configurations:
# File: wasm-micro-runtime/product-mini/platforms/linux/CMakeLists.txt
+set(WAMR_BUILD_INTERP 1)
+set(WAMR_BUILD_FAST_INTERP 1)
+set(WAMR_BUILD_LIB_PTHREAD 1)

set (WAMR_ROOT_DIR ${CMAKE_CURRENT_SOURCE_DIR}/../../..)
In the script above, the + sign represents added configurations. After making these changes, recompile and upload the compiled iwasm to the /usr/bin/ directory on the Milk-V Duo for future use.
Now, you have the iwasm runtime environment, and the wasm program udp_light.wasm is ready to run on the Milk-V Duo:
iwasm --addr-pool=0.0.0.0/15 --dir=/sys/ udp_light.wasm 440
After running this command, you will get the following output:

The 440 at the end of the command represents the GPIO corresponding to the onboard LED. Additionally, the --addr-pool specifies the allowed network range, and --dir specifies the directory that can be accessed.
At this point, you can use network tools on your computer to send UDP packets to the Milk-V Duo. I used a cross-platform tool called comtool.

On the Milk-V Duo, you will receive the messages and execute the corresponding actions.

Please note that when receiving “on” and “off” commands, the LED on the Milk-V Duo will turn on and off accordingly.
Now, you can write your programs in C/C++, compile them to wasm using wasi-sdk, and deploy them on the Milk-V Duo. The wasm programs you compile can also run on other hardware with iwasm, which means they are portable as long as they are not tied to specific hardware features.
4. Common Issues
- When running
iwasm, it shows permission denied:- This usually occurs when the execution permission is not set. You can grant execution permission using the command:
chmod +x iwasm.
- This usually occurs when the execution permission is not set. You can grant execution permission using the command:
- When running
iwasm, it shows not found:- This is typically due to not adding the necessary static compilation parameters. Please refer to the previous section where we discussed the initial compilation of WAMR. Ensure that you’ve configured it correctly. Additionally, for other similar issues, it may be related to missing libraries that need to be uploaded.
- When using
iwasmto runudp_light, it displays WASM module load failed: integer too large:- This error suggests that the network functionality configuration is missing. As explained in the previous section, during the second compilation of WAMR, you need to add the network functionality configuration and then recompile the runtime environment and upload it.
- When using
iwasmto runudp_light, it shows export gpio error or direction set error:- This indicates that the
--dirparameter is not correctly set, and the wasm program doesn’t have the necessary permissions to operate.
- This indicates that the
- When using
iwasmto runudp_light, it displays Bind failed: Permission denied:- This error suggests that the
--addr-poolparameter is not correctly set, and the wasm program doesn’t have the necessary permissions to use the network.
- This error suggests that the