This article is reprinted from: Milk-V Duo移植rt-thread smart_milk-v duo 触摸屏-CSDN博客, and the original author is: 风正豪.
Preface
(1) The PLCT lab is recruiting interns for a long time: Recruitment information link
(2) First of all, after receiving the Milk-V Duo board, I personally recommend porting the big-core Linux. Because there is relatively more information on it, and it’s much simpler, and the phenomena are easier to observe. After porting the big-core Linux and testing the board without any issues, you can then port rt-thread smart according to your personal needs.
Porting tutorial for Linux SDK: Milk-V Duo Quick Start;
(3) Prepare yourself, as I’m not sure about the specific level of the readers of this blog. I encountered many difficulties during my porting process, so I’ll provide a lot of explanations to help newcomers like me get started quickly. If experienced users feel it’s a waste of time, you can close this blog post and go to Yan Shisan’s article.
Yan Shisan’s Blog: Milk-V Duo rt-smart Compilation and Execution;
Preparatory Work
Prepare USB to TTL Module
(1) Since porting rt-thread smart outputs data through serial port 0, and Milk-V Duo’s TYPE-C is directly connected to a USB port, rather than using the serial port connected by the board, we need to prepare a USB to TTL module in advance.
(2) At that time, I was stuck here for a long time because I thought Milk-V Duo’s TYPE-C output data. So, you must, must purchase this module in advance. After purchasing this module, you also need to install the relevant driver on your computer.
(3) Driver installation tutorial for USB to TTL: Please refer to the “Using CH340 to Connect ESP32BOX Solution” section in Regarding the Problem of ESP32S3 Unable to Recognize the Port.

How to Connect
(1) Connection between the USB to TTL module and Milk-V Duo:
<1> GND — GND
<2> RX — GPIOA16
<3> TX — GPIOA17
(2) Use a mobile Type-C charging cable to connect to Milk-V Duo.


Flash the Image
Prepare Tutorial Compilation Toolchain
(1) Enter the following URL in your browser and download
riscv64-linux-musleabi_for_x86_64-pc-linux-gnu.tar.bz2
https://github.com/RT-Thread/toolchains-ci/releases/download/v1.7/riscv64-linux-musleabi_for_x86_64-pc-linux-gnu_latest.tar.bz2
(2) Transfer
riscv64-linux-musleabi_for_x86_64-pc-linux-gnu.tar.bz2to the/optdirectory on Linux. You may need root permissions during the process of moving. For Windows and Linux file transfer, you can use Samba or FileZilla. I personally prefer Samba, and here is the configuration tutorial: Ubuntu and Windows File Sharing with Samba
(3) Enter the following command to unzip and generateriscv64-linux-musleabi_for_x86_64-pc-linux-gnu_latest.
tar -xvf riscv64-linux-musleabi_for_x86_64-pc-linux-gnu_latest.tar.bz2

(4) If you have followed the above steps and placed it in the
/optdirectory, then you don’t need to worry about the following command. If not, you need to enter the following command into the command line:
export RTT_EXEC_PATH= The path to your cross-compilation toolchain/riscv64-linux-musleabi_for_x86_64-pc-linux-gnu/bin
Compile Image Files
(1) Follow these steps one by one to execute. (I am using Ubuntu 20.04, and the compilation environment may yield different results, and I’m not aware of the specifics)
git clone --progress --recursive -v https://github.com/RT-Thread/rt-thread.git
cd rt-thread/bsp/cv1800b/
scons --menuconfig
# After the menuconfig control interface pops up, exit it.
source ~/.env/env.sh
pkgs --update
scons -j10
./mksdimg.sh
(2) There are two potential issues to be aware of here:
<1> GitHub is on the internet, so repository downloads may fail. If you already have magic in Windows, you can refer to Ubuntu Virtual Machine Sharing Host VPN (for NAT or Bridge) to give Linux a bit of magic.
<2> The finalscons -j10may result in an error: /home/zyx/Desktop/test/rt-thread/components/libc/compilers/common/ctime.c:863: undefined reference to ‘rt_work_submit’.

(3) If you encounter the above error with scons -j10, execute the following command to roll back to a previous Git version:
git reset --hard c78f64689142cd36357edbe8db3b60a3c5c00e07
(4) If someone doesn’t understand why we execute the version rollback command above, let me explain:
<1> Firstly, when experts write the readme file, they have certainly confirmed the repository at some point, so you only need to roll back to the moment of the readme file’s last commit.
<2> Enter the readme file and find the history button as shown below:

<3> Click as shown below to find out the version number to which you should roll back, which is c78f64689142cd36357edbe8db3b60a3c5c00e07. After rolling back the version, execute the following commands:
scons --menuconfig
# Exit the menuconfig control interface after it pops up.
source ~/.env/env.sh
pkgs --update
scons -j10
./mksdimg.sh

Flash the Image
(1) For flashing the image, I did it in a Windows environment. So you need to transfer the fip.bin and boot.sd to Windows.

(2) First, download the DiskGenius software, insert the TF card into the card reader, and then connect it to your computer.


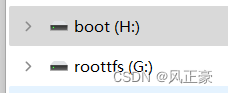
(3) After clicking “OK” and completing the partitioning, two drives will appear: one “boot” drive and one “roottfs” drive. Copy the compiled fip.bin and boot.sd into the “boot” drive.

On-machine Testing
Testing Procedure
(1) Plug in the USB to TTL module, but don’t connect the Type-C interface yet. At this point, you should see the LEDs on the board lit up.

(2) I recommend using the MobaXterm software or the Friendly Serial Debug Assistant. The reason is that the baud rate is an unconventional 117200. When I found out it was this baud rate, I was a bit surprised. It is said that there is a slight issue with UART0 of Milk-V Duo. However, I personally recommend testing at 115200 first, because by the time you read this blog, the official might have already fixed this bug.
<1> Configuration for Friendly Serial Debug Assistant:

<2> Configuration for MobaXterm:

(3) After configuring, connect to the serial port, and you might see a screen full of C. characters being printed. (Note: If you don’t see them, don’t worry, just proceed.)

(4) Now plug in the Type-C interface, and the serial port should start printing normal data.

Reasons for the Observed Phenomenon
(1) I got stuck during the on-machine testing part for quite a while, wondering why I was getting garbled characters. Later, I found out it was because I hadn’t plugged in the Type-C interface.
<1> After plugging in the USB to TTL module, it can power the core board of Milk-V Duo via the UART0_RX pin, causing the LEDs on the board to light up.
<2> However, the USB to TTL module’s current supply is limited, so the power cannot be raised high enough to fully start Milk-V Duo. As a result, the serial port keeps printing C. characters. If you don’t see the C. characters, it means that the USB to TTL module’s current supply can’t even raise the current to print C. (a bitter smile).
<3> After plugging in the Type-C interface, the power is successfully raised, allowing it to fully start the board and print the correct serial information.
(2) Regarding how I discovered this issue, first, I need to thank Ken Ge and the advice from the members in Ken Ge’s discussion group.
<1> Following the advice from one of the group members, I plugged in the Type-C interface and used a logic analyzer to capture serial data, but there was no change in signal levels.
<2> At this point, I disconnected the logic analyzer, plugged in the USB to TTL module, and noticed that there was no data printed on the computer.
<3> After removing everything and plugging in the USB to TTL module, I saw the C. characters being printed. Then, after plugging in the Type-C interface, normal data started coming through.
<4> Later, I learned from Ken Ge that the USB to TTL module can provide limited current, and the power may be the issue here. I had only focused on voltage.
(3) Why didn’t the logic analyzer capture signal level changes, but the serial port had data? The reason is quite simple. When I first plugged in the Type-C interface, the board had successfully started, and at that point, the serial port
entered a silent state, which is why there were no signal level changes on the logic analyzer. To capture signal level changes, you need to start capturing on the logic analyzer first and then plug in the Type-C interface.
Reference Articles
(2) Regarding the Problem of ESP32S3 Unable to Recognize the Port;
(3) Yan Shisan’s Blog: Milk-V Duo rt-smart Compilation and Execution;
(4) Ubuntu Virtual Machine Sharing Host VPN (for NAT or Bridge);
(5) How to Delete Storage Card Partitions and Repartition;
Acknowledgments
(1) Ken Ge;
(2) A member of Ken Ge’s discussion group (The member doesn’t seem to have a blog page, so we can only use the group nickname as a reference, with a bitter smile).