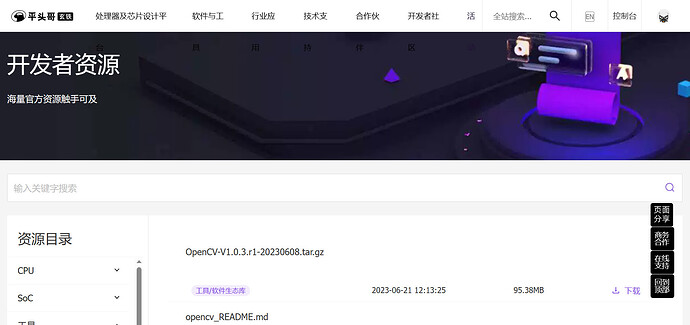
"Milk-V Duo is an MPU based on the Altek CV1800B chip, capable of running operating systems based on both LINUX and RTOS. The Altek CV1800B chip features the XuanTie C906 core, known for its powerful processing capabilities. Hence, we attempted cross-compiling the OpenCV image processing library for use with Milk-V Duo. XuanTie’s website (https://xuantie.t-head.cn/community/download?id=4112956065753141248) offers an optimized custom version of OpenCV, believed to maximize the chip’s performance. This version holds great promise.
1. Download and Compile OpenCV
We use the cross-compiler provided by Altek, available at https://sophon-file.sophon.cn/sophon-prod-s3/drive/23/03/07/16/host-tools.tar.gz. This package includes an ELF toolchain for bare metal and two versions of the toolchain, GNU and musl. We verified that the compiler version used in the official image matches the one in the provided toolchain, and it’s the musl version.
Create an env.sh file on the host and add the following content:
HOST_TOOL_PATH=/home/xxx/milk-v/CV180x/host-tools

export PATH="$HOST_TOOL_PATH/gcc/riscv64-linux-x86_64/bin:$HOST_TOOL_PATH/gcc/riscv64-linux-musl-x86_64/bin:$HOST_TOOL_PATH/gcc/riscv64-elf-x86_64/bin:$PATH"
Then, execute source env.sh in the host’s command line to set the environment variables.
Modify the compiler settings in OpenCV/platforms/linux/riscv64-gcc.toolchain.cmake:
set(CMAKE_C_COMPILER
riscv64-unknown-linux-musl-gcc)

set(CMAKE_CXX_COMPILER
riscv64-unknown-linux-musl-g++)
Generate the Makefile for OpenCV using the following command:
cmake ..
-DCMAKE_TOOLCHAIN_FILE="../platforms/linux/riscv64-gcc.toolchain.cmake"
-DWITH_OPENCL=OFF -DBUILD_opencv_calib3d=ON -DBUILD_ZLIB=ON -DBUILD_PNG=ON
-DBUILD_SHARED_LIBS=OFF -DCMAKE_BUILD_WITH_INSTALL_RPATH=1
-DCMAKE_INSTALL_PREFIX=../install -DBUILD_CSI_CV=ON -DWITH_OPENMP=OFF
-DWITH_PTHREADS_PF=OFF -DCORE=C906FDV
The only platform-specific part in this command is -DCORE=C906FDV; the rest of it is similar to compiling OpenCV on other platforms. Here, we define -DBUILD_SHARED_LIBS=OFF, so the generated library is static, making it more convenient for deployment. If you want a dynamic library version, you can change it to -DBUILD_SHARED_LIBS=ON, or you can download pre-compiled dynamic libraries from https://github.com/yue-xiaomin/Milkv-duo_Cross_Compile_software/tree/main/OpenCV.
After successful CMake configuration, use the make command for compilation, and then execute make install to copy the required library files and headers to the OpenCV/install directory."
2. Modifying the Interpreter Link of the Development Board
Although the compiler we use is identical to the one used by the vendor to generate the image, when we compile a simplest Hello World program to run on the board, it fails with the following error:
[root@milkv]~# ./hello
-sh: ./hello: not found
After referring to a post in the Milk-V forum (https://community.milkv.io/t/opencv-4-5-4/82), I found that the program interpreter specified in the INTERP segment of the compiler-generated program (/lib/ld-musl-riscv64xthead.so.1) does not exist on the development board, hence the program cannot run.
To solve this issue, a soft link needs to be created in the Milk-Duo environment:
ln -s /lib/ld-musl-riscv64v_xthead.so.1 /lib/ld-musl-riscv64xthead.so.1
After doing this, all compiled programs can run successfully.
Interestingly, the opencv_version that comes with OpenCV can run normally on the development board. Upon using readelf -l, it was found that the executable file does not contain an INTERP segment. I am not sure what compilation option was used to achieve this.
3. Writing a Test Program
We made some minor modifications to the example_cmake that comes with OpenCV to test its operation. The test program is located at /home/test/OpenCV/samples/cpp/example_cmake/.
Firstly, we modified its CMakeFiles.txt file as follows:
cmake_minimum_required(VERSION 3.1)
# Define project name
project(opencv_example_project)
# Find OpenCV, you may need to set OpenCV_DIR variable
# to the absolute path to the directory containing OpenCVConfig.cmake file
# via the command line or GUI
set (OpenCV_DIR /home/test/OpenCV/install/lib/cmake/opencv4/)
find_package(OpenCV REQUIRED)
set(CMAKE_CXX_FLAGS "-latomic")
# If the package has been found, several variables will
# be set, you can find the full list with descriptions
# in the OpenCVConfig.cmake file.
# Print some message showing some of them
message(STATUS "OpenCV library status:")
message(STATUS "    config: ${OpenCV_DIR}")
message(STATUS "    version: ${OpenCV_VERSION}")
message(STATUS "    libraries: ${OpenCV_LIBS}")
message(STATUS "    include path: ${OpenCV_INCLUDE_DIRS}")
# Declare the executable target built from your sources
add_executable(opencv_example example.cpp)
# Link your application with OpenCV libraries
target_link_libraries(opencv_example PRIVATE ${OpenCV_LIBS})
Then, modify the example.cpp file as follows:
#include "opencv2/core.hpp"
#include "opencv2/imgproc.hpp"
#include "opencv2/highgui.hpp"
#include "opencv2/videoio.hpp"
#include <iostream>
using namespace cv;
using namespace std;

void drawText(Mat & image);

int main()
{
       cout << "Built with OpenCV " << CV_VERSION << endl;
       Mat image;
       image = imread("test.jpg");
       drawText(image);
       imwrite("test2.png",image);
       return 0;
}

void drawText(Mat & image)
{
   putText(image, "Hello OpenCV", Point(20, 50),
            FONT_HERSHEY_COMPLEX, 1, // font face and scale
            Scalar(255, 255, 255), // white
            1, LINE_AA); // line thickness and type
}
Then, execute the following command:
cmake -DCMAKE_TOOLCHAIN_FILE="~/OpenCV/platforms/linux/riscv64-gcc.toolchain.cmake" .
make
This test program reads the test.jpg file, adds the “Hello OpenCV” string to the image, and then writes it to the test2.png file.
Here are the original image and the image with text added:
After successfully running the OpenCV test program on the development board, you can start writing more complex programs.
Q&A
1.
Q:not_found

A:please refer to Chapter Six of this article for the solution:Cross-compile OpenCV 4.5.4 (including cross-compilation environment configuration)


